When your Broan-Nutone fan goes out, expect the manufacturer to charge you $125 for the guts of a fan that cost $89. The smart thing would have been to purchase a new unit at the store and swap guts. However, the local stores were not stocking the item and it is possible Nutone no longer markets this model. The model fan we are dealing with in this article is the QT-90N-B. The replacement motor and squirrel cage unit is the JA 2B089N+. However, the problem we will deal with in this article is germane across models.
After a few years of service, usually within five to ten years, your Broan-Nutone fan motor will die. Replacing the unit with a similar sized unit is much more problematic than paying the extra bucks for a fan motor replacement unit. This usually comes with the squirrel cage attached, so the manufacturer can charge you more money. If you follow the instructions and replace the new motor-squirrel cage unit on the existing housing and everything worked just fine, there would be no point to this article. But the fact is, you will find very little tolerance between the flare of the housing unit and the nuts on the fan unit. And, that fact coupled with the out of balance squirrel cage means the fan is destined to scrape against the housing, sooner or later.
No problem, all you have to do now is call the manufacturer, explain the problem and request a new unit. Right? No – in fact, fat chance. Not only is it almost impossible to make contact with customer service, but if you are lucky enough to be one of the chosen for today’s call list, you won’t find a customer service rep who even cares about your problem. This inspires me to take the housing unit and mash down the flare at the opening for the squirrel cage with a hammer. But, I know this is not the best solution and I will eventually regret it.
 Instead, I remove the fan housing from the ceiling box and then remove the fan from the housing with a 1/4 inch nut driver, removing three screws. In this photo, I have already separated the units. You can see how the bolts extend beyond the nuts and have the potential to rub against the squirrel cage. If you are going to gain extra clearance, this is where it will begin.
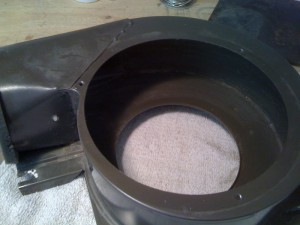 This photo exhibits the housing unit for the fan. If you look at the opening at the bottom, you will see how the metal is flared upward toward where the fan will sit when assembled. There will be no benefit to mashing this flare down, or flattening it.
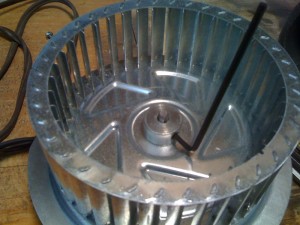 To remove the squirrel cage from the fan unit, you will need a 1/8 inch hex key. Insert this into the shaft’s set screw and break it loose.
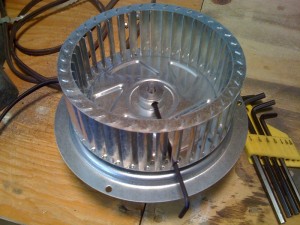 After it is loose, you can insert the long end of the hex key into the set screw by way of the hole in one of the fan blades, designed for this purpose.
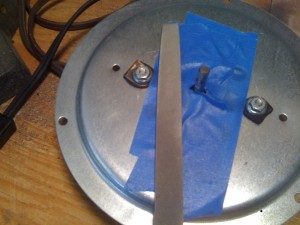 The bolts are sitting high off the nuts. We are going to file these down. Before we do this, I have already taped off the holes for ventilating the motor – you do not want to get any shaving into the motor unit. If you do, you will be going through this process all over again. Also, in this photo is the mill bastard file we will be using to file down the ends of the bolts. We file the bolts so they are flush with the top of the nuts. In this case, I even filed the top of the nuts just a little bit. Before removing the tape (don’t forget to do this), I blew off all shavings using an air hose set to 30 pounds pressure. Using more pressure than this is hazardous – especially with small metal shavings. Also, I would strongly recommend using eye protection during this process.
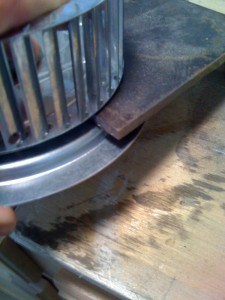 In assembling the unit, I used a 1/4 shim of steel to gauge distance while I tightened the set screw to the shaft, using the 1/8 inch hex key. Then, I assembled the motor and squirrel cage to the housing unit, using the three screws and a 1/4 nut driver.
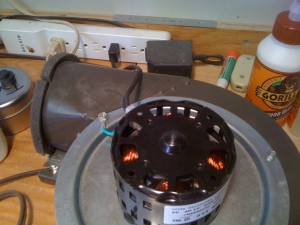 The next step is to test the unit. After spinning the unit by hand to verify the squirrel cage is free of obstructions, plug it in and see if there is any scraping. Being very careful not to touch any electrified parts, I also moved the housing unit up-down, side-to-side and angled to confirm the squirrel cage was still free of obstruction. No scraping noises – you are good to go.
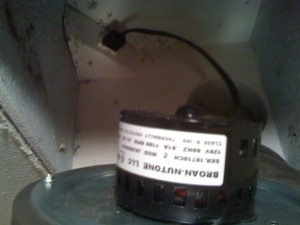 Before you install the unit in the ceiling, make certain the electrical switch to the fan is off. If it is on an automatic timer, turn off the power to the switch by turning off the breaker in the electrical panel box. When you install the fan housing unit into the ceiling box, don’t forget to plug in the electrical cord.
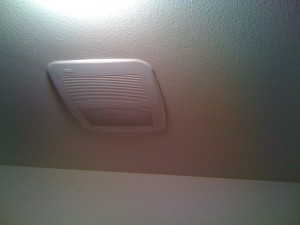 After you have the unit installed in the ceiling box and the three holding screws tightened with a 1/4 inch nut driver, turn on the power and confirm there is no scraping of the squirrel cage. Once confirmed, install the ceiling cover and you are good to go. I hope this is helpful to you.
Thank you Broan-Nutone for giving me the opportunity to assist your customers, since you are not inclined to do so yourself.

